This last picture is edited for personal reasons.....
Monday, January 26, 2009
Sunday, January 25, 2009
Tutorial
I'm doing this tutorial a little bit different this time around. I'm working on trying to get a program that will record what I do so that it will be in a video format. I have 25 photos and it was way too complicated to upload them all in this post. So I have made a slide show of it. All you need to do is double click on the slideshow and it will bring up a new screen with all the pictures. From there, you can click on the pictures to enlarge. I will be writing a little caption for each picture. All of the pictures are numbered at the bottom right hand corner. I hope this is easy enought to understand!! If not, any other ideas would be great!
1) Open a picture you want to work with.
2) If it needs to be cropped, crop it at this time. I wanted to make this picture into a header for my blog so I cropped it into a rectangle.
3) There are 2 parts to this step. First you will need to duplicate the layer. All you have to do for this is go over to the right hand side and right click on the background picture layer. Scroll to duplicate and click on it. This will bring up a new layer. To do this next step make sure you click on the new layer. Second, we are going to be doing this step on the new layer you've created. Now, I want to bring out her face and brighten it a bit. So to do this I did filter-->render-->lighting effects.
4) When the box pops up, make sure you change the "light type" to "omni". Then move the circle on the picture to brighten it in the area you want.
5) Once you have done the previous step, if the lighting is too bright, go ahead and change the opacity a bit. You will see I've moved the slider to 76%.
6)Now right click on the picture and go to "flatten image".
7) We are going to make a blurred frame around the picture. To do this we want to make a "new layer". To do that go to the little icon that looks like a page half flipped up. Click on that and a new layer will be created.
8) Go over to your "paint bucket" on the left hand side of the screen. Make sure your color is set to whatever color you want. I am using black.
9) Make sure you are on the new layer when using the paint bucket. Go ahead and fill the new layer with the color you've selected.
10) Now we are going to cut out the middle so that only the edges remain. On the left hand side again, click on the dotted box icon. Now drag a box of what you want cut out.
11) Once you have selected what you want to delete, go to the top toolbar to Edit-->delete. You should see the section has been deleted.
12) Now we are going to blur the edges a bit for a soft look. To do this step go to the top toolbar again and go to Filter-->Blur-->Gaussian Blur.
13) When the box pops up, you can preview how much you want to blur it. I've chosen 32.6 pixels.
14) Now we are going to do the same as we did in step 5 and reduce the opacity. I've reduced mine to 83%. Flatten the image again like we did in step 6.
15) We need to add a little color to the lips. Create a new layer again. Go over and choose the brush. We want to use a nice soft brush for the lips. I will be using the soft round 100 pixel brush. You can always make the brush larger or smaller if you need to.
16) Now we need to change the color from black to a nice pink color to add to the lips.
17) Once you've picked your color, it's time to color in the lips. I take my brush and completely fill in her lips.
18) Now we have to set the blending mode so that it will blend in and not look so fake!
19) Go to the dropdown menu like you see in the picture and click on "soft light". You will see that it doesn't look as opaque and is more see through.
20) Change the opacity again with the slider until there is just a hint of color. Flatten the image again.
21) Now we are going to add color back into the eyes. Go to the left hand side and click on the "quick selection tool". You will see it highlighted in the picture.
22) Make sure it's on the "add to selection" tab.
23) Take the tool and click on the eyes.
24) Once you have them selected, go to Enhance--> Adjust Color--> Color Variations.
25) The box will pop up and you can add whatever color you like. I used blue since my daughter has blue eyes. Click OK. Make sure you flatten the image one last time. Now and you are finished! You can go to file and save it as a JPEG.
I hope this has helped. I'm sorry if it's a little hard to understand. Blogger was not friendly to me by putting the pictures in order as I uploaded them. If you have any questions please ask! And, if you try this, pass along your edits to me! I would love to see them!
Wednesday, January 21, 2009

Monday, January 19, 2009
Tutorial
I am in the process of putting together a tutorial on how I have edited a few pictures. Hang tight I promise it's coming. This week is just a busy one!
P365 week 3!
 This week was fun! I love doing this. I don't feel pressured to take "good photos". Just pictures of daily life. It doesn't have to be fun and interesting. Just the little things....
Thursday, January 15, 2009
p365 day 15
I am SUPER excited!! I just got home from Nashville to do some shopping for a ball gown. I found the dress! I feel so comfortable and pretty in it and I cannot wait to share it with you! Here is a sneak peak and my photo for the day....


Tuesday, January 13, 2009
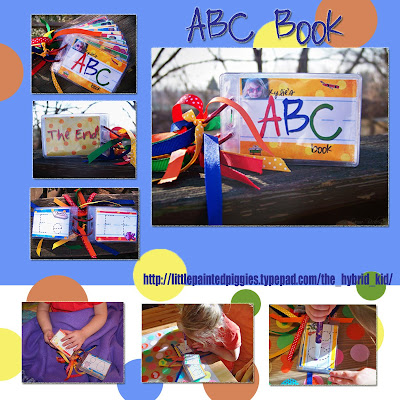
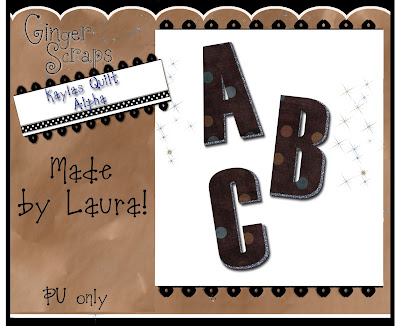
ABC Book
I have the privilege of being on another team of great women!! It's called The Hybrid Kid and let me tell you, if you have kids, you MUST check this site out! It is my favorite new site for fun activities and learning materials for Moms and their kids. Here is the newest project. It's an ABC book complete with 26 letters in upper and lower case, 15 sight words, a cover, a blank cover, a blank lined sheet, and all five colored backgrounds. It's also available in PDF format so you can just print and make it! The best part is that it's only $4.00!!! Check out The Hybrid Kid!

Monday, January 12, 2009
p 354 day 12
 Today I haven't been feeling so well. It came out of nowhere! I was out and about doing some shopping, looking for ball gowns, and actually having a ton of fun. But then all of a sudden I felt yucky and nauseated. Thankfully it's gone for now. I took a picture of my favorite dish... beef stroganoff! It was YUMMY!
Sunday, January 11, 2009
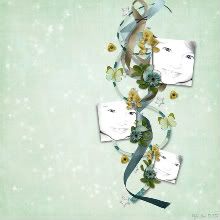
p365 Week 2 LO
Here is my finished LO for this week! This really is so much fun!!
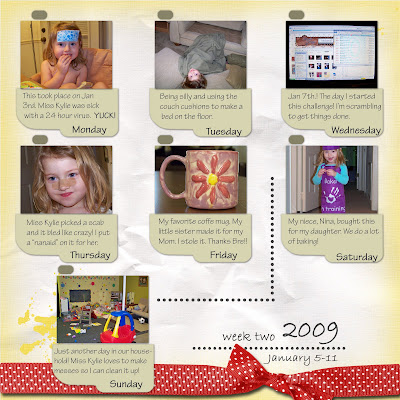
credits: Template by hummiesworld, GingerScraps kit "cool off"
Saturday, January 10, 2009
P365 day 10

My darling daughter got a present in the mail today from her cousin! I have wanted an apron set for our Kooking with Kylie specials! I couldn't resist taking a picture of her in it!!
P365 day 9
.jpg) This my favorite coffe mug! My little sister made it for my mom when she was younger and somehow I ended up with it. Thanks Bre!
This my favorite coffe mug! My little sister made it for my mom when she was younger and somehow I ended up with it. Thanks Bre!
Thursday, January 8, 2009
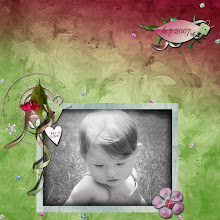
P365 Week 1
.jpg) Here is my LO for week 1! I started it a little late in the game... like 2 days ago! So, to improvise, I used my pictures from New Years!
Here is my LO for week 1! I started it a little late in the game... like 2 days ago! So, to improvise, I used my pictures from New Years!
P365 day 8

Miss Kylie had a "owie" on her nose. She somehow picked the scab off and it bled like crazy! I put a "nanaid" on it last night before bed and she actually left it on all night. I had to take a picture of it this morning because she looked so cute!
Wednesday, January 7, 2009
P365
 Here is my post for project 365! I'm still fumbling around trying to get my brain wrapped around all that I have to do!! It seems so complicated but in reality it's not. I joined the competition a little late so there will be more to come on that.... but for now, here is my picture for today!
National Delurking Week!
 If you are out there and happen to come across my blog for one reason or another, please leave a comment!! This is National De-Lurking Week! I get hundreds of visits but I have no clue who you are! I only have 1 or 2 faithful commentors. Now is your chance to show yourself! Let me know you like my blog and you are watching! You don't even have to leave your name. Just tell me you are looking! Thanks
Tuesday, January 6, 2009
Speed Scrap!
It's time for another speed scrap tonight over at GingerScraps!! If you have never done one before, please go over there and give it a try! It's great fun!
Wed. Jan 7
7pm Pacific
8pm Mountain
9pm Central
10 Pacific
There is an awesome PP from Harmonystar!

Monday, January 5, 2009
Participation Prize!!
If you haven't checked out the "Color Challenge" in the GingerScraps forum, please go check it out! If you make a LO using the color palette I've made, you will automatically get a prize just for participating! Here is the PP for January....
.jpg)
Sunday, January 4, 2009
2009!!!
It's 2009 and let's start it off with a bang!! Here is the newest from Ginger over at GingerScraps! For PU only ;)
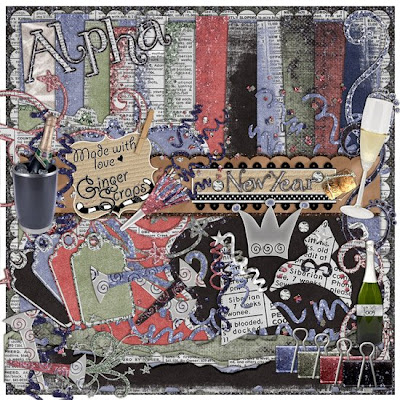 Only $4.00!!
New Year includes:
* 1 full Alpha
* 12- Textured Papers (12 by 12, 300 dpi)
* 4- Embellished Bracket Matts or Journaling boxes
* 4- Bling Binder Clips
* 2- Champagne Bottles (one in ice bucket)
* 1- Champagne Glass (including a bit of bubbly)
* 4- Confetti Glitter Explosions
* 1- Cork
* 1- Diamond Stud
* 3- Party Hats
* 6- Noise Makers
* 6- Swirls- Glitter, Newsprint, and more Bling!
* 4- Tags- Embellished with Newsprint and more bling
* 3- Torn and Curled Borders
MY LO will be coming soon!
Only $4.00!!
New Year includes:
* 1 full Alpha
* 12- Textured Papers (12 by 12, 300 dpi)
* 4- Embellished Bracket Matts or Journaling boxes
* 4- Bling Binder Clips
* 2- Champagne Bottles (one in ice bucket)
* 1- Champagne Glass (including a bit of bubbly)
* 4- Confetti Glitter Explosions
* 1- Cork
* 1- Diamond Stud
* 3- Party Hats
* 6- Noise Makers
* 6- Swirls- Glitter, Newsprint, and more Bling!
* 4- Tags- Embellished with Newsprint and more bling
* 3- Torn and Curled Borders
MY LO will be coming soon!
Subscribe to:
Posts (Atom)